
Integrating the Sennheiser® TeamConnect Ceiling 2™ with Xilica Solaro Solutions
Xilica Designer software includes ready-made, drag-and-drop modules for instant integration and control of the Sennheiser TeamConnect Ceiling 2 (TCC2) microphone's parameters including source detection, LED control, gain control, and metering.
Deployment Steps
Install and launch the latest version of Xilica Designer software
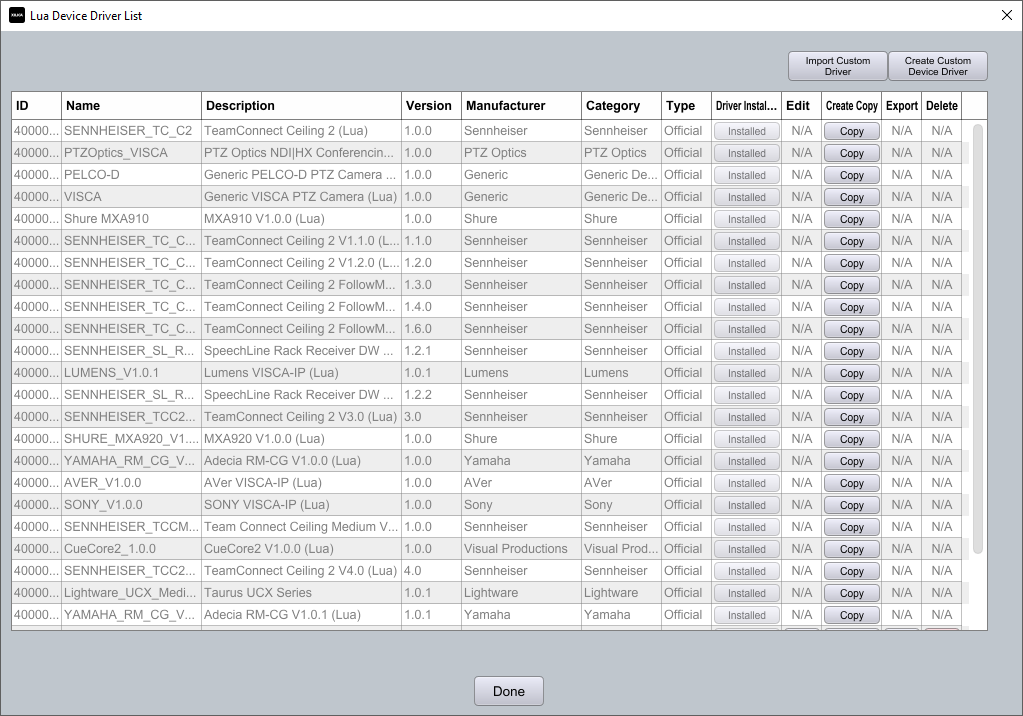
Navigate to Lua Editor menu → Lua Device Drivers
Click Install next to the latest version of the Sennheiser® TeamConnect Ceiling 2™ driver
Recommendation: Install all available drivers in this list for easy future access
Click Done when complete
Open your Project file (.pjxml)
From the Component Library under Sennheiser → Mic, drag the latest TeamConnect Ceiling 2 (Lua) driver onto the Project View workspace
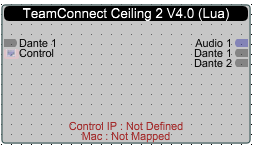
Right-click the module and choose:
Map Physical Device
Dante Device Mapping
Select the MAC address of the microphone's Dante port
(Ensure the microphone is powered on and discoverable in Designer's Network View)
Right-click the module again and choose:
Map Physical Device
Universal Control IP Setting
Setup IP Address...
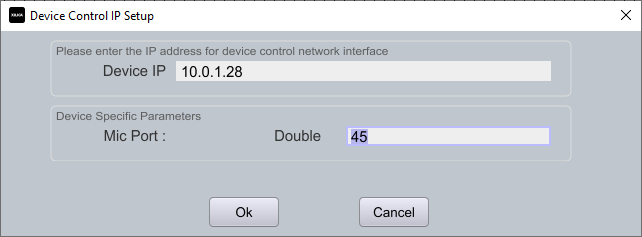
Enter the IP address of the microphone's LAN port (find this using the Sennheiser Control Cockpit software or a network scanner)
The default port number is 45
Click Ok
Complete the wiring between devices in Project View, including the Dante channels of the microphone
Click "Load Design to Devices" to go live with the hardware and begin passing audio