Scheduling Presets in a Solaro System for a Specific Time/Date
The Project Scheduler in Xilica Designer allows you to automatically recall presets at scheduled times, with options for one-time or recurring events.
Prerequisites
Before scheduling, you must have created presets in Designer. See the relevant Knowledge article for instructions on saving presets.
Setting Your Time Zone
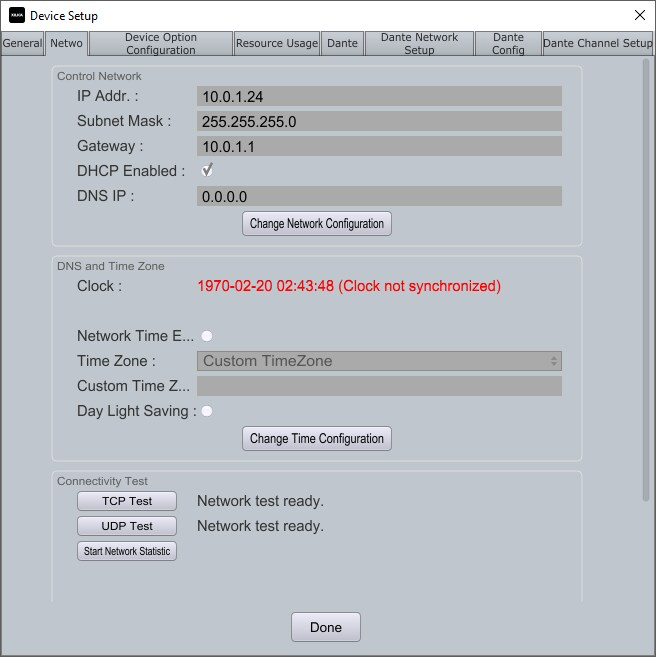
In Xilica Designer's Network view, double-click the device icon and select the Network Tab
In the Date and Time Zone section, click "Change Time Configuration"
Select your time zone from the dropdown menu
Click "Apply" then "Done"
Synchronizing Your Device Time
Xilica Designer can synchronize your computer's clock with the device's real-time clock (not related to audio clock sync)
In Network view, check the Clock icon in the lower left of the device block:
Normal clock icon = Device time matches your computer
Clock with question mark = Device time differs from your computer
To synchronize a single device:
Right-click the device block → Synchronize Device clock
To synchronize all devices:
Click "Sync clock to all devices" at the top right of the software
Devices will automatically reboot after synchronization
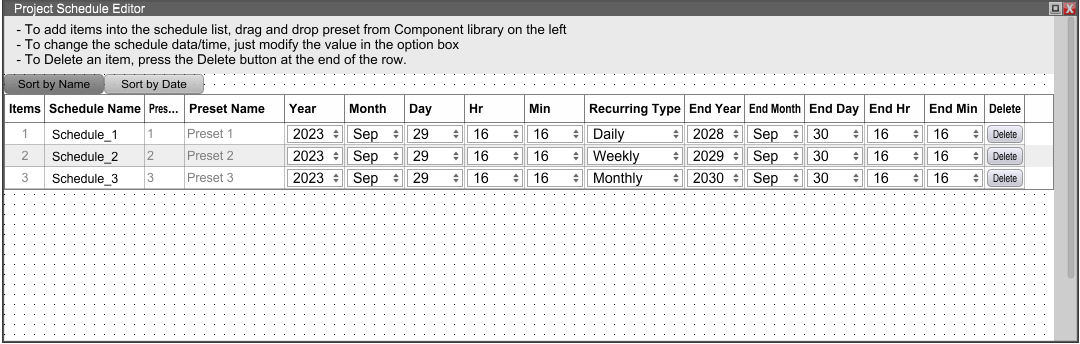
Creating Scheduled Events
Navigate to Project View and click the "Project Scheduler" button on any Solaro device
All saved project presets will appear in the left Component Library menu
Click and drag your desired preset(s) into the Project Scheduler
Set start and end dates using the dropdown menus
Configure the event as a one-time trigger or recurring event