
Sequencer with Momentary Trigger
This guide explains how to trigger a sequenced output using a momentary input connected through GPIO.
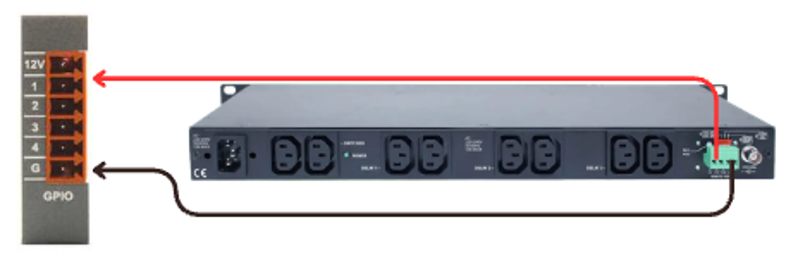
1. Hardware
Wire the momentary trigger device to the GPIO Card
(Follow the wiring reference for correct pin and ground connections.)
This allows the system to detect a brief button press or contact closure.
2. Software
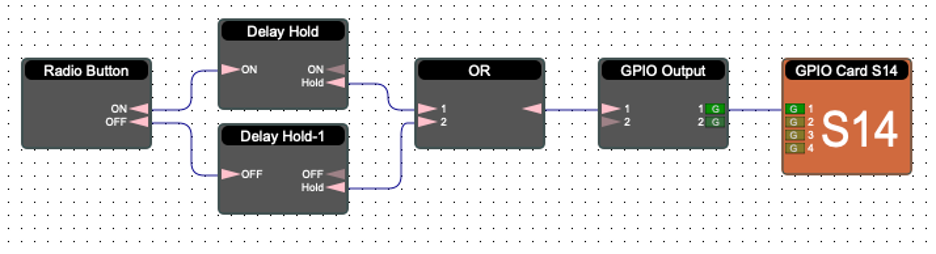
Step 1 - Add required modules
Add the following blocks to your project:
Radio Button
Delay Hold-1
Delay Hold-2
OR Module
GPIO Output Card
Step 2 - Connect the logic
Route the Radio Button into both Delay Hold-1 and Delay Hold-2.
Send both Delay outputs into the OR Module — the OR selects whichever Delay Hold is active.
Connect the output of the OR Module to the GPIO Output block.
Step 3 - GPIO Output assignment
Open the GPIO Output Card and assign the correct GPIO channel used by the sequencer or controlled device.
3. Test
Press the radio button → momentary input triggers the sequencer
The GPIO Output will follow whichever path is active:
Delay Hold-1 logic
Delay Hold-2 logic
This confirms the sequencer is functioning and responding correctly to momentary triggers.